How to transfer Health data to an iPhone or Apple Watch
Get link
Facebook
X
Pinterest
Email
Other Apps
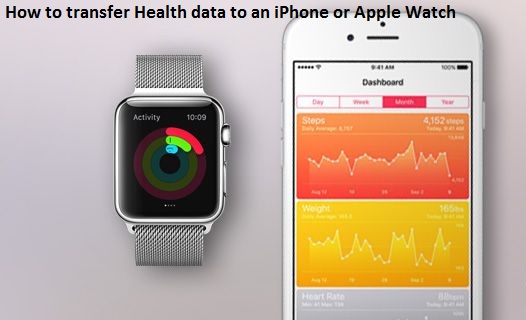
Did you switch to a new iPhone or Apple Watch but want to see your health data on your new device also? As it is a private type of information, it is considered as optional data to sync. Here is how to get your health data
on your new device. How to backup your health data from
encrypted iTunes backups or iCloud
All the health data from Apple Watch
is synced to the health repository of your iPhone. If you want to recover your
health data, then you should have to create a backup of it (Health repository).
It means you need to create the backup of your iPhone.
1.
With USB cable, link your iPhone to your computer.
2.
Now, open iTunes on it.
3.
Click to ‘iPhone’ icon to open your iPhone on your computer.
4.
Click on ‘Summary’ from the left side column.
5.
At the middle of the screen, click and check the box of the ‘Encrypt
iPhone or iPad backup.’ Doing this will enable your health data to back up.
6.
Click on ‘Back up Now.’ This option is under ‘Manually Backup and
Restore’ section.
That’s it! You can also use iCloud
to sync your health data. Before using this process make sure that your iPhone
and Apple Watch are upgraded and running on iOS 11. How to Use Health Data Importer to
import your health data to your new iPhone
Health Data Importer is a great app
that you can use to export your health data. With the Health Data Importer, you
can straightforwardly transfer your health data from the Health app. You can
get this app on your Apple App Store.
1.
Launch the ‘Health’ app on the iPhone from which you’re exporting the
health data.
2.
Open ‘Health Data’ tab from the bottom.
3.
Touch on the ‘User’ icon at the upper-right corner.
4.
Then tap on ‘Export Health Data’ on the next screen.
5.
Tap ‘Export’ on the prompt window. And wait for a few minutes.
6.
Save the export data by tapping ‘Save to Files.’
7.
Take your new iPhone and set it up.
8.
Launch the ‘Health’ app on your new device.
9.
Set up the ‘Health’ app with your basic information.
10. Install the ‘Health Data Importer’ on it.
11. After downloading and installing Health
Data Importer, open it.
12. Tap on ‘Import’ at the top right corner.
13. Locate to the location into the ‘Files app’
where you saved your final export file and choose the ‘export.zip’ file.
14. Select the data you want to import, tap on
‘Select All’ to import all.
15. And then tap ‘Next’ at the top right
corner.
16. Select ‘Turn All Categories On’ on the
prompted Health Access menu.
17. Tap ‘Allow’ at the top right corner.
18. Once importing has finished, open ‘Files
app.’
19. Tap on ‘Select’ from the top right corner.
20. Look for ‘export.zip’ file and select it.
21. Hit the ‘Delete’ icon from the bottom right
corner.
That’s it! Now, access your Health
data on your new iPhone or Apple Watch. Lucia Mandela is a self-professed security expert; he has been making the people aware of the security threats. Has passion is to write about Cyber security, cryptography, malware, social engineering, internet and new media. She writes for Norton security products at norton.com/setup.
An annoying situation in Windows is Black Screen, which is commonly known as BSoD- Black Screen of Death. In the case of BSod, the computer doesn’t show any error message leaving the user without knowing the reason for this sudden Black Screen in Windows 10. There are two possible layouts of black screen. In the first scenario, you will log in to the computer but later you will not get a display. And in the second scenario, the display remains black and you cannot log in to the computer. The situation has been reported by the number of people who use Windows 10. But, we are going to solve the Black Screen Problem after signing in Windows 10. If you are also going through the same issue, then follow the steps to troubleshoot the Black Screen problem. 1. As mentioned above, in one scenario you will be able to log in to the computer. Log in the computer, then go ahead and open the task manager. • To open Task Manager press Ctrl+Alt+Del . • ...
Have you face this situation, you are using your Windows 10 computer system and all of sudden your operating system automatically increase their volume level. You have shocked that what the happening on your computer. But no need to worry for that its a fundamental issue on the Windows 10 PC. So please now, no need to wondering on that condition if your computer system strangely increases their volume. We are proving some of the amazing ways to resolve this issue. So if you are also facing this issue, then please read this post carefully and follow one of them the way to get immediate right with it. Some Effective Way to Solve Window 10 Volume Increase Issue Method-1 Run the Audio Troubleshooter You have seen that your windows ten computer system increase their audio or volume or do down automatically by itself then you need to Run the Audio Troubleshooter on your system. For this, Press the Windows + I key to open up the S...
Google smartphones are widely used among professionals. Their built and design is quite different from the other brands and looks more professional. Each of their subsequent smartphones tries to outdo the previous ones in terms of features and design. The latest Google Pixel 5 has tried to do the same, but some contradictions are going on. Users are claiming that the previously launched Google Pixel 4 is far more compelling than the latest version. Google launched Pixel 5 in the year 2020. Pixel 5 has many of the latest software that negates many hardware limitations observed in the earlier version. But it also removed certain useful features that are present in Pixel 4. Usually, Pixel smartphones are quite reasonable in price. Google has also released some budget smartphones for a wide range of user base. But Pixel 5 neither has unique features, nor was its price reduced. This could be the reason why people think Pixel 4 as a feasible option. The largest-sell...

Comments
Post a Comment