How to Fix Sensor, Motion and Location Problems Using Sensors Troubleshooter
Microsoft provides the Sensor troubleshooter that can help the users to fix the problems, including Motion, Location as well as sensors on Windows 10. The auto-rotation in tablet or desktop may stop working without any reason, or rotation lock option may be visible as the grayed out that makes it impossible for Windows 10 to turn the screen in the correct direction. If the auto-rotation doesn’t work even after basic troubleshooting like checking for updates and starting the device again, then follow the given steps. If you are experiencing the same trouble and wanted to fix it, then this post might be helpful for you. Go through the post and follow the steps to correct the Sensor, Motion, and location problems using Sensors Troubleshooter.
Troubleshooter in Windows 10
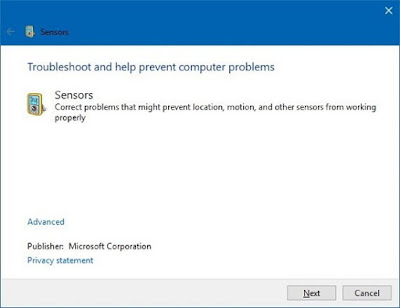
Sensor Troubleshooter of Windows
If you want to fix the Sensor, Motion, and location problems, then you can follow the provided steps:
- Download Sensor Troubleshooter from Microsoft.
- Tap twice on downloaded SensorDiagnosticTablet.diagcab to open.
- Select Next to run Troubleshooter.
- Follow the onscreen steps to proceed.
When the users run sensors Troubleshooter, they can select to run it as the administrator and then Apply repairs. If they untick this box, the tool will detect the issues and notify you.
- Choose them then tap on Next to solve the issue.
- If the users tap on View detailed information link, they will see some extra information about the test and scans which it has approved.
The troubleshooter will confirm if:
- Sensor Monitoring Services has started.
- Window Location toggle is ON.
- Group Policy stops sensors.
- Users can download Sensors Troubleshooter from anywhere.
Confirm the Settings of Screen Rotation
If you want to Confirm the Settings of Screen Rotation, then abide by the given steps:
- Apply Windows key + A to launch the Action Center.
- Tap on the Expand option.
- Select the Rotation lock to switch it OFF.
- Change the direction of the device.
Fix the Screen Auto Rotation That Grayed out
In case you need to Fix the Screen Auto Rotation That Grayed out, then you need to follow the offered steps:
- Type Windows key + R to launch Run command.
- Input regedit.
- Tap on OK to launch the Registry.
- Go to the following path:
HKEY_LOCAL_MACHINE\SOFTWARE\Microsoft\Windows\CurrentVersion\AutoRotation
- Tap twice to allow the DWORD then ensure that the value is set to 1.
- Select OK.
- Tap twice on LastOrientation of DWORD and ensure that the value is set to 0.
- Choose OK.
- Tap twice on SensorPresent of DWORD and ensure that the value is set to 1.
- Press OK.
- Tap twice on SlateEnable of DWORD and ensure that the value is set to 1.
- Hit OK.
Nelson King is a creative person who has been writing blogs and articles about cyber security. He writes about the latest updates regarding mcafee.com/activate and how it can improve the work experience of users. His articles have been published in many popular e-magazines, blogs and websites.

Channa Ve Lyrics
ReplyDelete